null
Gtechniq

Gtechniq GT1 Ceramic Coating Kit 50ml | Easy Apply 1 Layer Coating

No reviews yet Write a Review
Ask Questions

Gtechniq GT1 Ceramic Coating Kit 50ml | Easy Apply 1 Layer Coating

$109.95
  • SKU: GT1KIT
  • MPN: GT1KIT

This item is out of stock we expect more around Jul 30th 2026

Current Stock:Only left:
Description

Gtechniq GT1 Ceramic Coating Kit 50ml | Easy Apply 1 Layer Coating

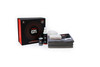
Kit Contains:

  • 50ml GT1 Ceramic Coating
  • 100ml Panel Wipe
  • AP5 Microfiber Applicator
  • Pair of GLoves
  • MF1 Microfiber Towel
  • 4x MF6 Microfiber Towel

The newest coating from Gtechniq available at The Clean Garage. GT1 delivers the trusted performance of a Gtechniq ceramic coating in a fast, single-layer application. Engineered for first-time users and enthusiasts alike, GT1 can be applied outdoors with ease while offering a more straightforward application process than traditional waxes.

The advanced ceramic formula chemically bonds to the surface, creating a durable layer of protection that helps resist swirl marks while delivering outstanding hydrophobic performance and tight water beading. Dirt releases more easily, helping keep surfaces cleaner for longer.

Designed as a true all-surface coating, GT1 can be applied to paintwork, PPF, trim, wheels and glass, allowing every exterior surface to be protected with a single product.

GT1 is designed to provide 12 months or more of protection on paintwork, PPF, wheels, trim and unswept glass. In the swept area of a windshield, durability is reduced to several months due to abrasion from the wipers.

Simple steps to help you get the best results

  • BEFORE YOU BEGIN: Park the vehicle out of direct sunlight and make sure the  ambient temperature is above 5°C or 40°F. Working in the right conditions will make the process smoother and help you achieve the best finish.
  • STEP 1 – DEEP CLEAN YOUR CAR: Even if your car is brand new, we recommend carrying out a full decontamination wash before applying any protection. This removes transport residue, fallout, and any bonded contaminants picked up at the factory or dealership.
    You’ll find full guidance in the wash guide provided. You do not have to use Gtechniq products for this stage. What matters most is that the surface is completely clean and contaminant free before you move on.
    Once washed, ensure the vehicle is fully dry before moving on to Step 2.
  • STEP 2 – PANEL PREPARATION: Put on the supplied gloves before you begin
    this stage and keep them on while applying the coating.
    Spray Panel Wipe onto the MF1 Microfibre Buff Cloth, the lighter grey cloth in the kit, and wipe down each panel you’re going to coat.
    Work your way around the vehicle one panel at a time. Make sure all streaks and residue are fully removed before moving on. Taking a little extra care here will help ensure a smooth application and the best possible finish.
    Make sure the entire vehicle has been prepared in this way before progressing to Step 3.
  • STEP 3 – APPLY THE COATING:
    Prepare the applicator pad: Apply GT1 evenly to the supplied applicator pad, ensuring the face is fully covered. The pad should be evenly primed but not overloaded.
    Apply the coating: Start with the painted panels. Begin at the top of the vehicle and work your way down. Larger areas such as the bonnet or roof are easier to manage in two sections, while smaller panels can be completed in one go.
    Apply using smooth, overlapping passes. Work side to side first, then up and down to create an even, consistent layer. This crosshatch technique helps ensure full coverage and makes missed areas easier to spot.
    Flash time: Allow the coating to sit for a short time until you see it begin to react and separate. You’ll notice the change as it shifts from a smooth, even film to a surface with visible beading. In warmer, more humid conditions this usually happens at around 30 seconds. In cooler, drier conditions it can take closer to 60 seconds. Keep your eye on the coating rather than the timer,
    as the exact timing can vary depending on the environment.
    Residue removal: Using a clean MF6 Microfibre Cloth, one of the darker grey cloths in the kit, gently remove residue with light, controlled movements. Avoid applying pressure.
    Immediately follow with a second clean MF6 cloth to refine the surface and buff to a clear, high gloss finish.
    Inspection: Under good lighting, inspect each panel carefully to ensure all residue has been removed and the finish is even. Use a torch if needed to highlight any areas that require attention.
    Continue the process: Re-prime the applicator pad as needed and continue panel by panel until the entire vehicle is coated.
    Coated areas will feel noticeably slick to the touch. Once all painted surfaces are complete, move on to the windows, then trim, and finally the wheels.
  • STEP 4 – CURE: For best performance, allow the coating to cure for 7 days before washing the vehicle. This allows full bonding and ensures maximum durability.